
Remove AI assistant from android with developer tools
AI features are supposed to make our life easier but for privacy-oriented people the AI on OS-level might feel a bit invasive. And sometimes AI integration on system level feels completely pointless – it can be used in a browser too – why do I need to be repeatedly asked to use AI assistant? It’s jamming the flow of other apps.
Have you already tried to remove AI assistant from your phone? If disabling it from your Google account and removing/disabling AI-related apps from your phone menu didn’t do the trick – this post is for you!
My pet peeves with AI assistant
I got annoyed the phone asking me to use AI assistant every 2-10 minutes while driving when I’m just trying to listen music in the car. Volume goes down and sometimes phone just randomly skips rest of the song.
In my case I see no value in OS-level AI-integration – I can use it in browser if needed. And for me the point of having a phone should be calling, messaging, listening music and checking something quickly to move on with the day. I’d rather enjoy my time off on PC device than on my phone – the screen is bigger and it’s less stressful for the back. I think setting boundaries with AI usage is as is needed for attention as it’s for privacy.
Prepare the phone
- Open the Settings from your phone and look for “About Phone” > “Device info”.
- When you find the parts that says “Build number” tap that 7 times in a row. The phone should announce that Developer mode is now on.
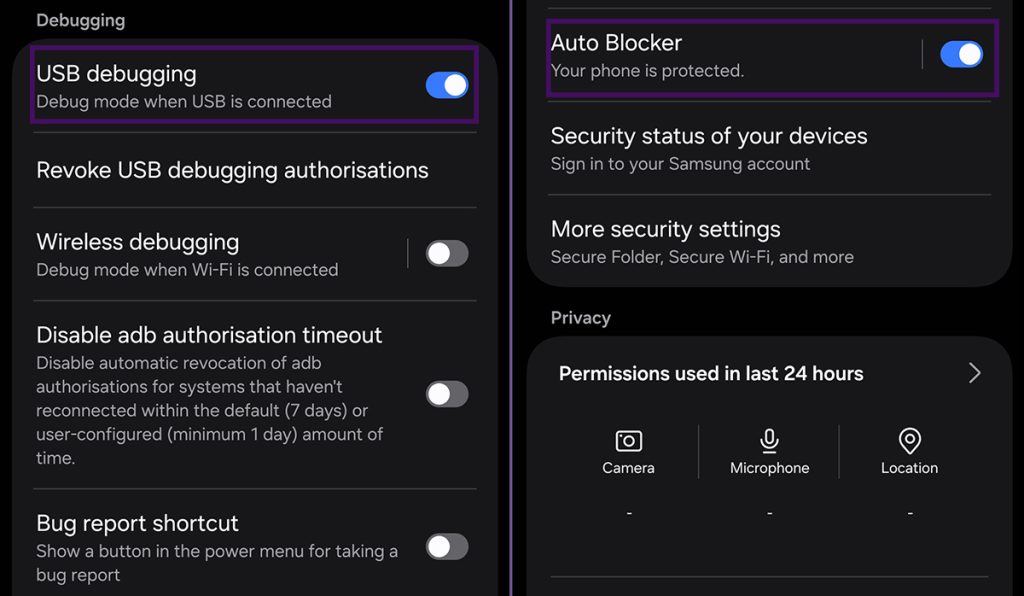
- Go back to Settings-menu and scroll down. There should be “Developer Options/Settings” menu available now. There should be USB-debugging in those options. Turn that on.
- If the option is greyed out and it says “Blocked by Auto Blocker” go back to the Settings. From there choose “Security and Privacy”. Tap the Auto Blocker –feature off. Then go back to Development Options and enable USB-debugging.
Plug the phone in to your PC/laptop after the setup. Tap the “enable USB-debugging” permission on phone screen.
Toolkit and navigating to the folder
Download the official Google ADB Platform Tools (zip-file) to your PC/laptop and extract the Zip-file. https://developer.android.com/tools/releases/platform-tools
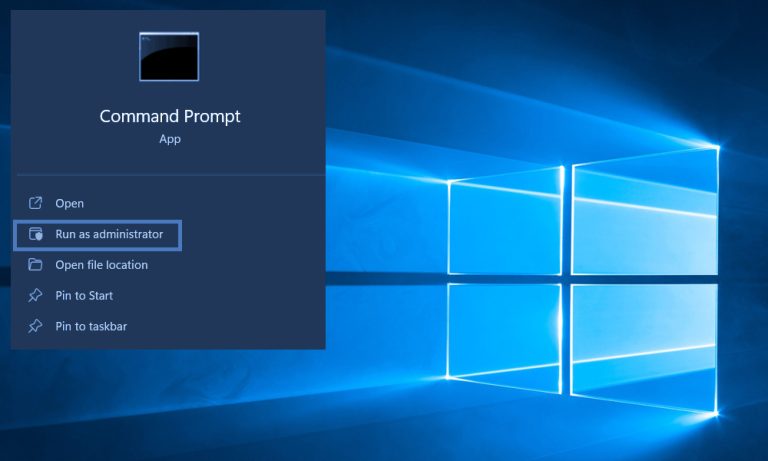
If you’re using Windows open up CMD or PowerShell as an admin.
On macOS: Finder> Applications > Utilities > Terminal.
Linux hotkeys: Ctrl + Alt + T.
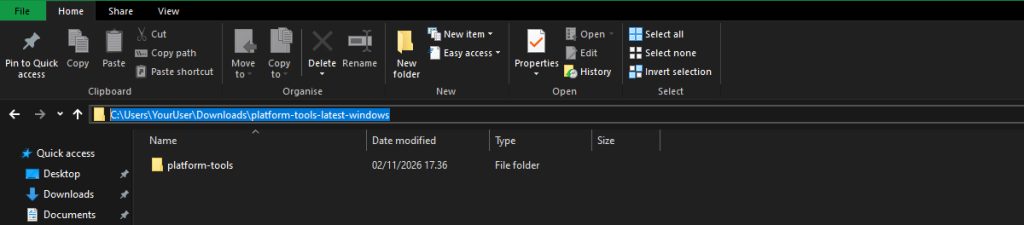
Make sure you’re in the folder where the downloaded tool is. You can do that by typing the command “cd C://PathToTheToolkit” where C://PathToTheToolkit is the folder path in Windows.
Remove like a dev – you can do it!
Now that you’re on command-line and in the correct folder, feed the following lines one at the time and hit “Enter”. Depending on the android version you have there are 2 sets of commands.
For older versions
adb shell pm uninstall -k –user 0 com.samsung.android.bixby.agent
adb shell pm uninstall -k –user 0 com.samsung.android.bixby.wakeup
adb shell pm uninstall -k –user 0 com.samsung.android.systemui.bixby2
adb shell pm uninstall -k –user 0 com.samsung.android.app.settings.pixby
adb shell pm uninstall -k –user 0 com.google.android.apps.googleassistant
For new versions:
adb shell pm uninstall -k –user 0 com.google.android.apps.bard
adb shell pm uninstall -k –user 0 com.google.android.apps.ai
adb shell pm uninstall -k –user 0 com.google.android.googlequicksearchbox
adb shell pm uninstall -k –user 0 com.samsung.android.bixby.agent.dummy
adb shell pm uninstall -k –user 0 com.samsung.android.intelliwidgets

Verify removal: adb shell pm list packages –u
REMEMBER TO TURN OFF USB -DEBUGGING WHEN NOT IN USE AND AUTO BLOCKER BACK ON IF YOU HAD TO TURN IT OFF FOR THIS OCCASION!
Read also: Vulnerability discussion around Microsoft brings up the question about responsibilities